
In a world where everyone’s a potential Spielberg, knowing how to record on an iPhone 12 is a game changer. Whether it’s capturing that epic family moment or documenting your cat’s latest shenanigans, your phone’s got the tools to make it happen. It’s like having a Hollywood studio in your pocket—minus the fancy coffee and the dramatic flair.
Table of Contents
ToggleUnderstanding The Basics Of Recording
Recording on an iPhone 12 starts with understanding its built-in features. Users encounter a user-friendly interface designed for simplicity. The Camera app serves as a central hub, offering options for both video and audio capture.
Accessing the Camera app requires just a few taps. Swiping left or right reveals modes like Video, Slo-Mo, or Time-Lapse. Selecting the Video mode triggers the recording function, allowing immediate capture of moments.
In addition to basic recording, the iPhone 12 includes various settings. Adjusting resolution impacts video quality. Users can choose between 4K and 1080p, depending on their needs. Higher resolutions provide greater detail but consume more storage.
Adding audio enhances the recording experience. Users connect external microphones for improved sound quality if desired. Built-in microphones capture ambient sounds effectively as well. Checking audio levels before recording helps ensure quality.
Editing options follow recording, letting users polish their content. The Photos app includes editing tools to trim videos, adjust exposure, and apply filters. Users can create unique clips that stand out by utilizing these features.
Sharing recorded content happens effortlessly through social media platforms or messaging apps. Tap the Share button in the Photos app to post directly. Users can also send videos via email for a more personalized touch.
Understanding these basics empowers users to record high-quality videos with the iPhone 12. Familiarizing oneself with its features guarantees memorable moments captured in professional quality.
Different Types Of Recording On iPhone 12
Recording on the iPhone 12 offers various methods, each tailored to different needs. The device accommodates voice, screen, and video recordings with ease.
Voice Memos
Voice Memos allows users to capture audio quickly. This feature turns the iPhone 12 into a portable recording studio. Users can record notes, lectures, or thoughts on the go. The interface is intuitive, making it easy to start a recording with just a tap. After recording, individuals can trim, enhance, or share audio files effortlessly. Voice Memos stores recordings in a conveniently organized list for easy access.
Screen Recording
Screen Recording captures everything displayed on the iPhone 12 screen. This function is ideal for tutorials or gameplay commentary, providing a simple way to share content visually. Users can enable this feature from the Control Center with just a few taps. Audio options allow for recording external sounds or internal audio directly. After capturing, users can edit and share recordings via messages or social media platforms.
Video Recording
Video Recording on the iPhone 12 showcases exceptional quality. The Camera app offers multiple modes including Video, Slo-Mo, and Time-Lapse, enabling a range of creative options. Resolutions can be adjusted for higher quality, staying suitable for various projects. Users benefit from enhanced stabilization technology, ensuring smooth video playback. Simple editing tools within the Photos app allow for quick adjustments before sharing the final product.
Step-By-Step Guide To Record On iPhone 12
Recording on the iPhone 12 proves intuitive. The device offers multiple methods for capturing audio and video effortlessly. Below are the detailed steps for each recording type.
Recording A Voice Memo
Open the Voice Memos app to begin. Tap the red circular record button to start capturing audio instantly. Pause the recording by tapping the same button again. Once finished, tap “Done” to save the memo. Users can name their recording and access editing tools for trimming or enhancing audio quality. Voice Memos allow quick access to notes, lectures, or ideas, serving as a valuable tool for anyone needing immediate audio capture.
Screen Recording Setup
Access the Control Center by swiping down from the top right corner. Look for the Screen Recording icon, represented by a circle within a circle. If the icon isn’t visible, add it via the Settings app under Control Center. Press and hold the Screen Recording icon to access additional options, such as enabling microphone audio. Tap “Start Recording” to capture everything on the screen. Users will see a countdown, after which recording begins. An easy way to stop is by tapping the red status bar at the top of the screen.
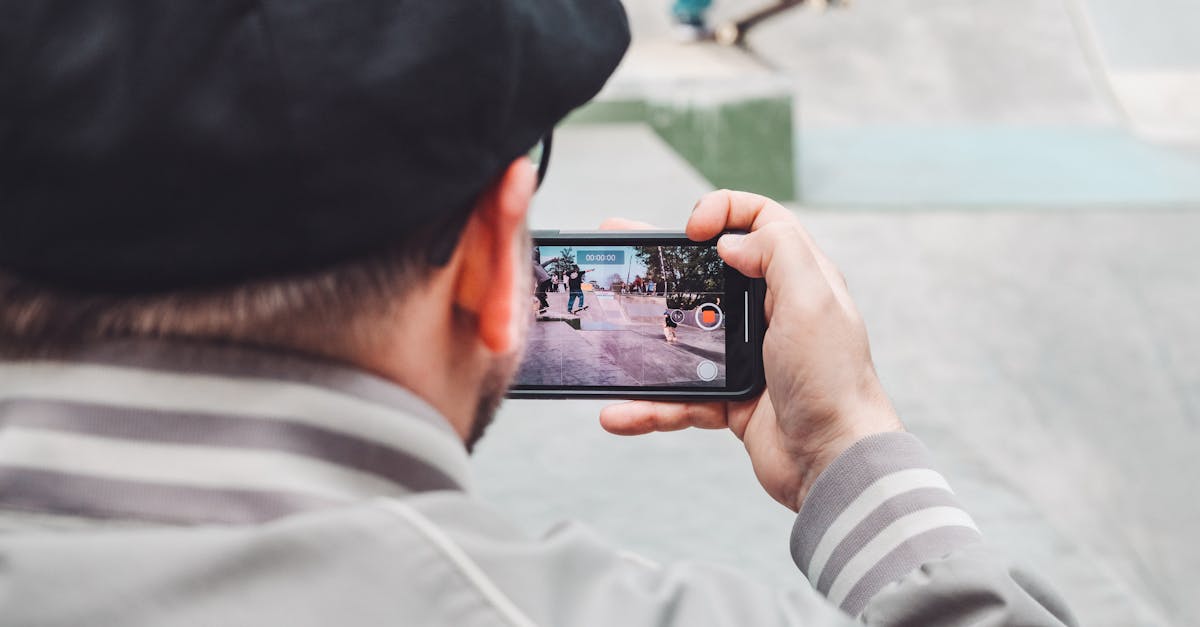
Capturing Video
Launch the Camera app to start video recording. Switch to Video mode by swiping left or right on the screen. Tap the red record button to begin capturing video; tap it again to stop recording. The iPhone 12 supports various recording resolutions. Users can adjust these settings in the Camera section within Settings. Utilize features like stabilization and grid lines to enhance video quality further. After shooting, access the Photos app for immediate editing and sharing options. This capability ensures polished content suitable for sharing on social media or via email.
Tips For Better Recording
Enhancing video and audio quality on the iPhone 12 requires several key strategies. First, utilizing natural lighting leads to clearer, more vibrant visuals. Ensure subjects are well-lit and avoid backlighting for optimal results.
Maintaining a steady hand or using a tripod significantly improves stability during recording. This reduces motion blur and creates a professional appearance. Choose a tripod specifically designed for smartphones for maximum compatibility.
Pay attention to the audio environment. Minimizing background noise enhances sound clarity. Select quieter settings or use external microphones for better sound capture.
Remember to adjust camera settings in the Camera app. For example, choosing the highest resolution enhances the overall quality of videos. Experiment with different recording modes, such as Slo-Mo for added creativity.
Incorporate different angles and perspectives for more dynamic content. Moving around subjects or changing perspectives adds visual interest. Plan multiple shots to create a more engaging story.
Editing plays a crucial role post-recording. Use the Photos app to trim excess footage or enhance color and lighting. Familiarize yourself with various editing features for polished results.
Sharing videos requires attention to format. For social media, ensure video dimensions fit platform specifications to avoid cropping. Consider text overlays to provide context or enhance engagement.
Following these tips leads to higher quality recordings that leverage the iPhone 12’s capabilities. Optimization turns ordinary moments into visually stunning memories that are easily shareable.
Recording on the iPhone 12 opens up a world of creative possibilities. With its advanced features and user-friendly interface, anyone can capture stunning videos and clear audio effortlessly. Whether it’s a family event or an exciting gaming session, the iPhone 12 makes it easy to document those moments.
By exploring various recording modes and utilizing editing tools, users can enhance their content significantly. Following simple tips for improving video and audio quality can further elevate recordings. The iPhone 12 not only makes recording accessible but also encourages users to express their creativity and share their stories with the world. Embrace the power of this device and start capturing unforgettable experiences today.


